Wall Decor
12 Gallery Wall Ideas for Living Rooms That Feel Balanced
Twelve gallery wall ideas for planning balanced living room arrangements, measuring around furniture, testing paper templates and choosing safe mounting methods.
- Published
- November 12, 2026
- Reading time
- 12 minutes
- By
- NorahDecor Editorial
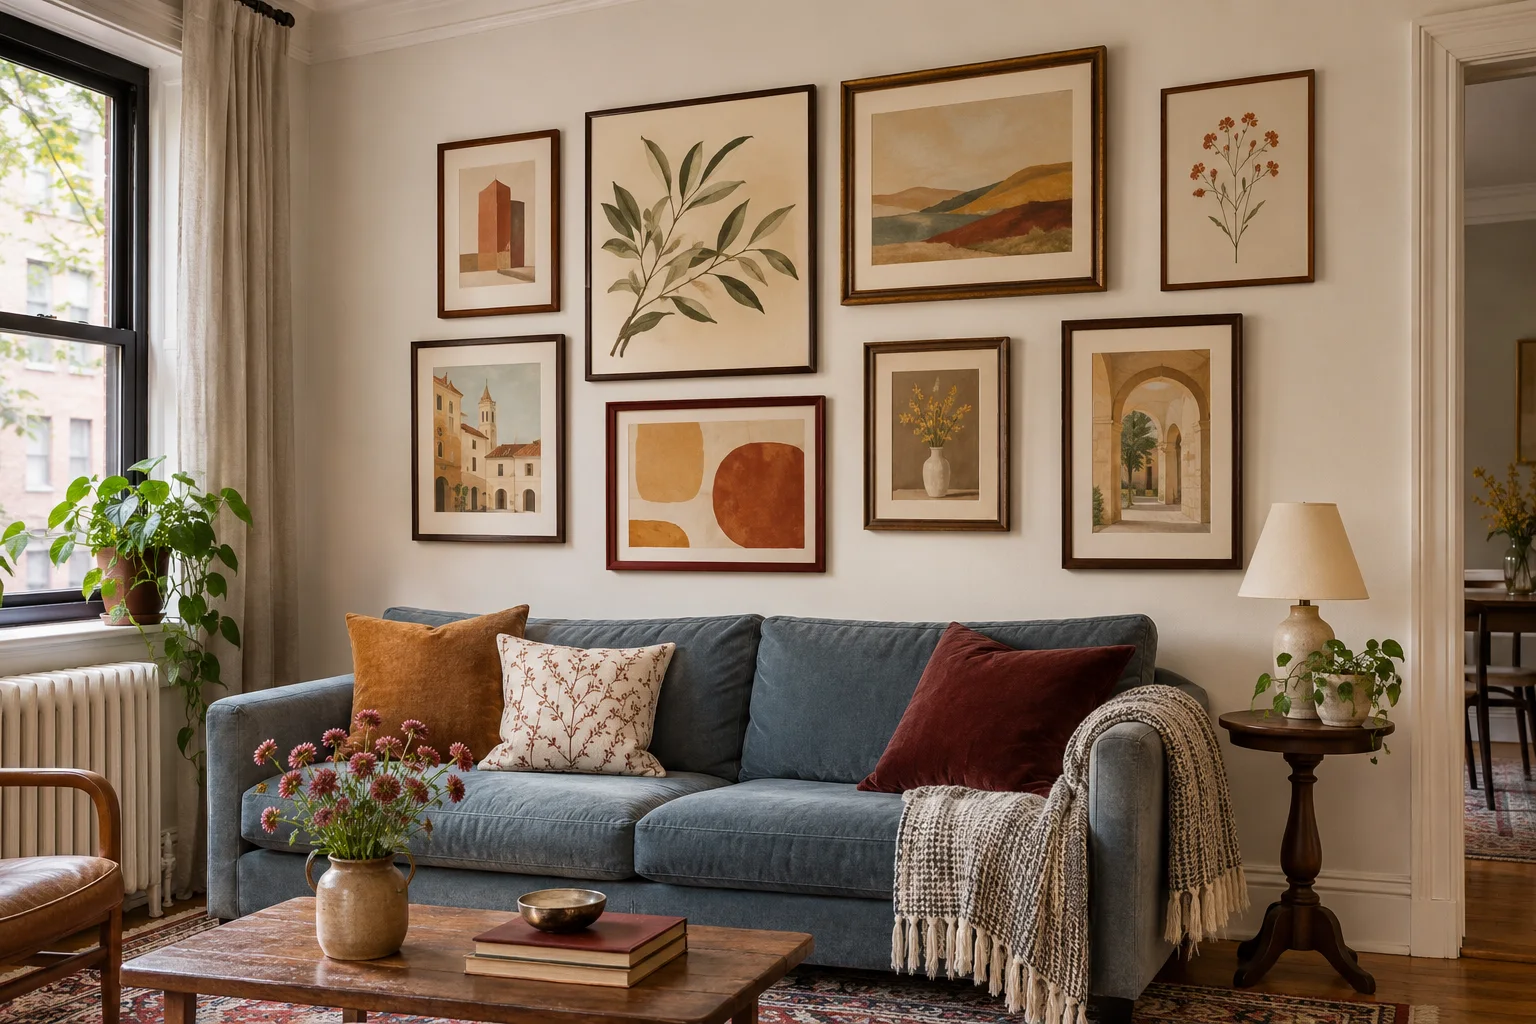
A gallery wall can make a living room feel collected and personal, but the result depends on more than choosing attractive pictures. The grouping has to relate to the wall, the sofa or console beneath it, and the way the room is viewed. When those proportions are ignored, even beautiful art can look scattered.
The most successful gallery wall ideas begin as a plan on the floor or in paper, not as the first nail in the wall. You need to know the total footprint, where the visual center belongs, how much space the frames need, and what kind of hardware the wall can support.
These twelve approaches range from strict grids to relaxed salon arrangements. Use them as adaptable starting points rather than fixed formulas. A narrow apartment wall, a long sofa, and a tall room each need a different composition.
Measure the wall as part of the room
Start with the usable wall area. Measure between corners, doors, windows, sconces, vents, and tall furniture. If the gallery will sit above a sofa or console, record the furniture width and height too. The art should feel connected to that piece without appearing squeezed against it.
Make a rough elevation on paper. Draw the wall rectangle, add the furniture, then mark the maximum area you want the gallery to occupy. Consider where people usually see it: from the doorway, across the sofa, or close up in a hallway.
There is no universal centerline that suits every living room. Eye level is a useful reference on an open wall, but a gallery over furniture may need to sit lower so the two read as one composition. Ceiling height, seated sightlines, frame sizes, and the furniture all affect the final position.
Before hanging anything, identify the wall material and weigh each frame. The hardware must suit the frame, wall, and load. Locate wiring and other hidden services before drilling.
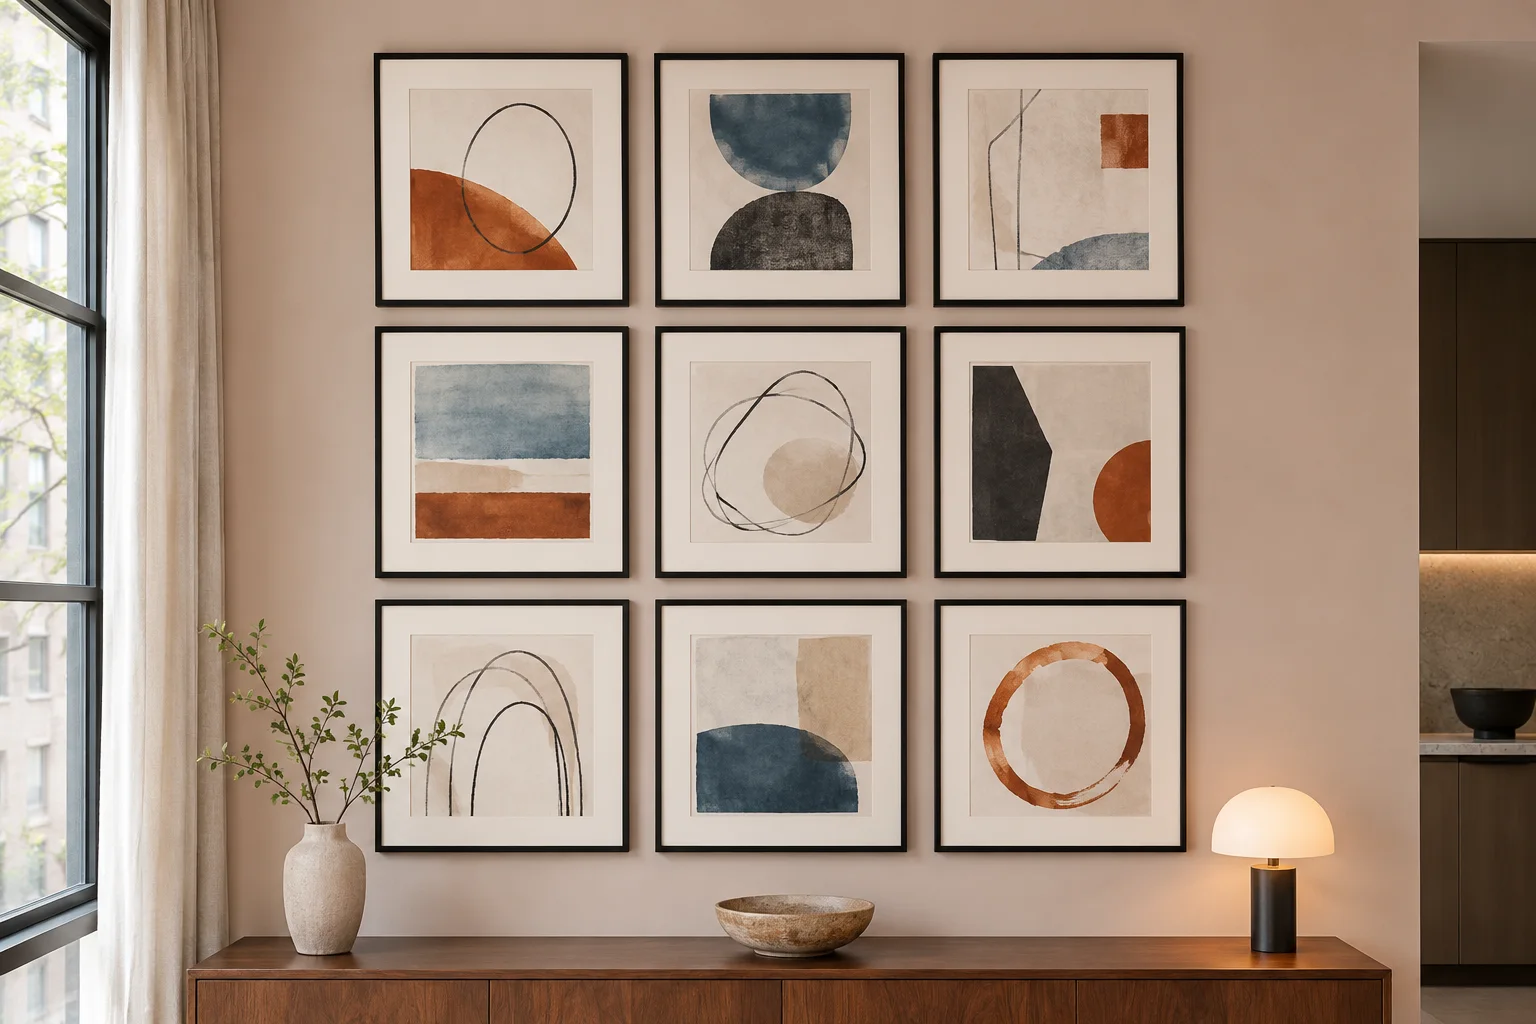
1. Build a balanced grid with matching frames
A grid is the clearest approach when the artwork has consistent dimensions. Use matching frames and mats, then align the outer edges and internal gaps. The repetition gives nine small works the visual presence of one large piece.
Lay the frames on the floor first. Measure the total width and height, including every gap, then transfer the outside rectangle to the wall with low-tack painter's tape. Work from a center reference rather than beginning at one edge and hoping the last column lands correctly.
This arrangement works well above a console, in a dining corner, or on a broad living room wall. The precision is part of the design, so a level and careful hardware measurements matter. If the frame hooks are not identical, aligned top edges may still produce uneven art.
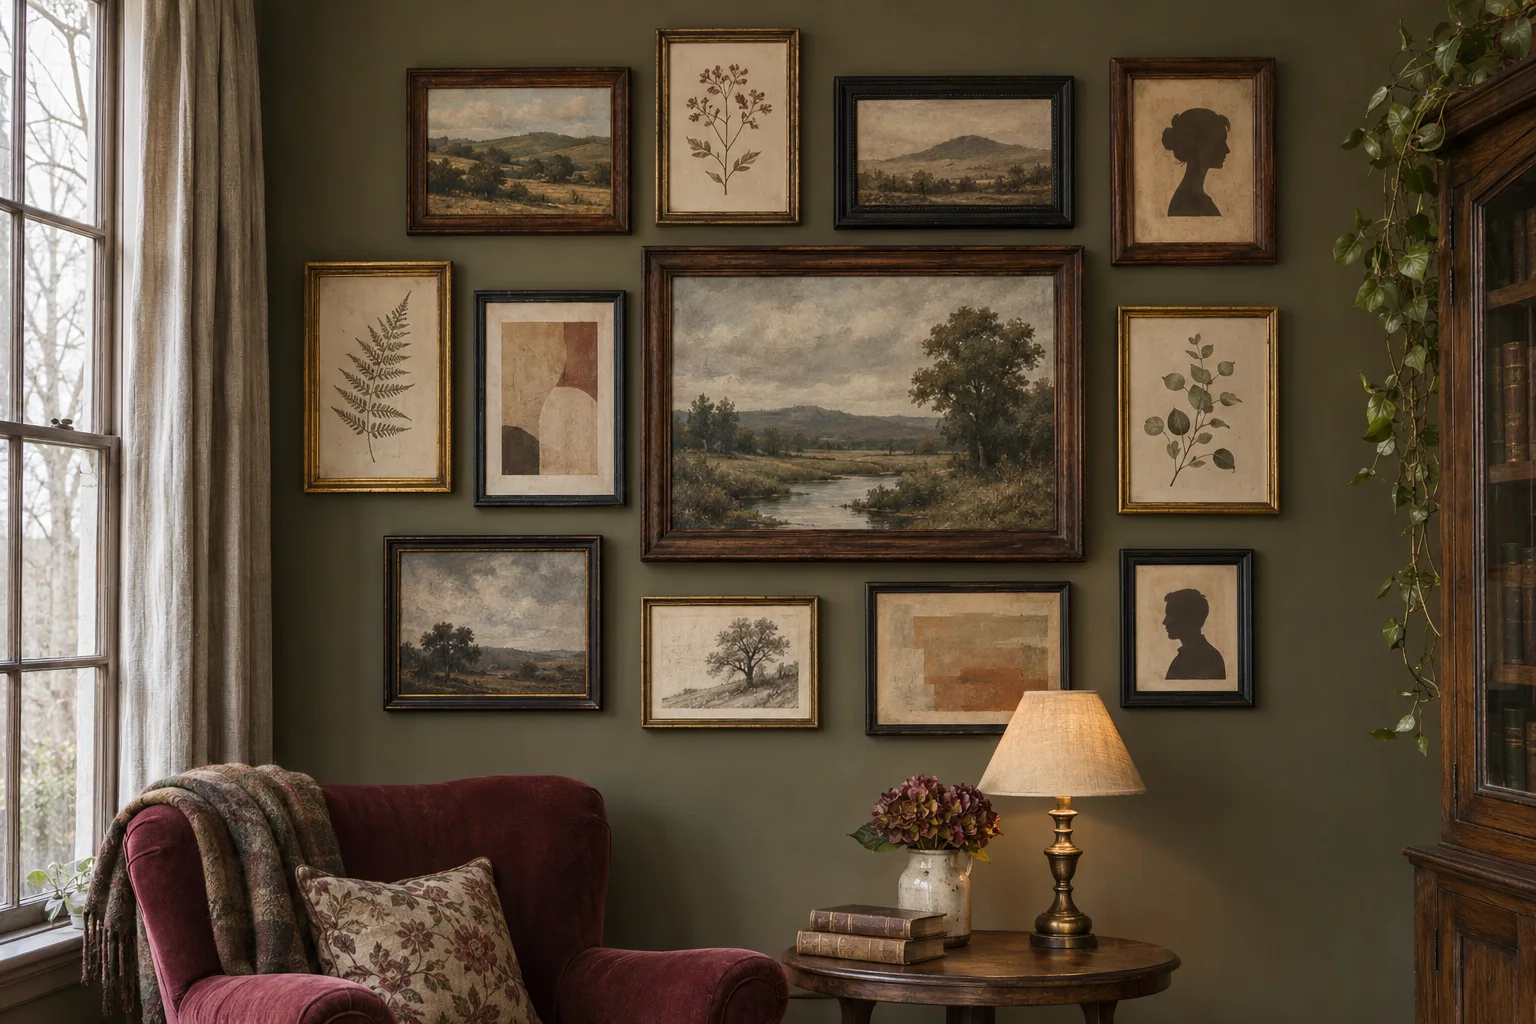
2. Create a relaxed salon arrangement around one anchor
An organic gallery can combine photographs, drawings, paintings, and prints without looking random. Begin with one larger work as the visual anchor. Add medium pieces around it, then use smaller frames to resolve the edges.
Keep one or two threads consistent. You might repeat dark wood frames, use art with similar muted colors, or maintain a fairly steady gap between pieces. The outlines can be irregular while the overall mass remains balanced.
Stand back from the floor layout and squint. If one corner looks much darker or heavier, trade a frame or adjust the spacing. Balance does not require mirror symmetry, but the visual weight should not seem to slide off one side.
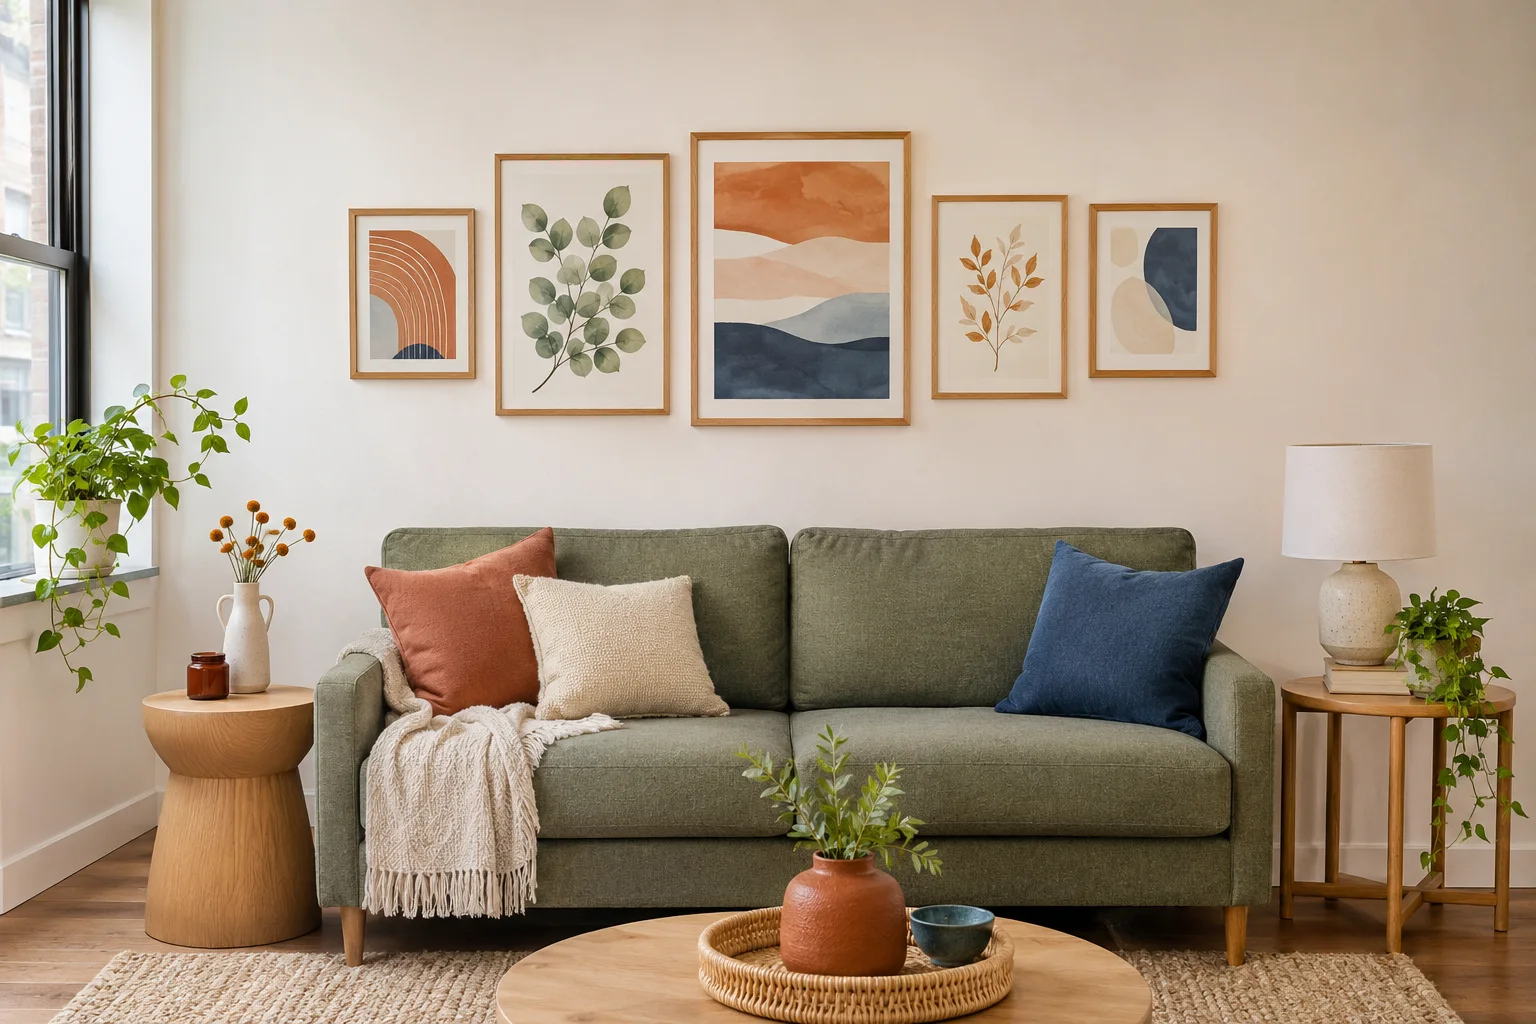
3. Size a gallery wall in relation to the sofa
The sofa is already a strong horizontal shape. A gallery above it should respond to that width instead of floating as a small cluster or extending far beyond the furniture.
Tape the proposed outer boundary on the wall and sit across the room. The grouping should feel generous enough to belong with the sofa, while leaving wall space at the sides. Check the vertical gap from the sofa back to the lowest frame. It should look connected without putting frames where heads, cushions, or people moving the sofa could contact them.
Do not copy a single online measurement without checking your furniture. A high-back sofa, low ceiling, deep picture ledge, or large reclining cushions can change what feels comfortable and safe.
4. Mix frame sizes within a controlled palette
Different frame sizes create movement, but color is what can make the group feel intentional. Choose a limited combination such as walnut, black, and aged brass, or use many frame profiles in one painted color.
Repeat each finish more than once. A single bright white frame in a wall of dark wood can feel accidental unless its artwork provides a clear reason for the contrast. Mats can also connect unrelated pieces by repeating the same warm white or cream tone.
Keep the largest frames away from a fragile-looking outer edge. Placing them nearer the visual center helps the grouping feel stable. Smaller pieces can bridge awkward gaps, but they should still be artwork you want to see rather than filler bought only to complete a shape.
5. Use matching frames to unify different artwork
Matching frames are useful when the subjects vary widely. Family photographs, line drawings, small abstracts, and travel prints can coexist when the border, mat, and scale provide a common structure.
Edit the image selection before framing. Convert some photographs to black and white, repeat a limited color, or crop images so important details remain visible at the intended size. Do not enlarge a low-resolution file until it looks soft or pixelated.
This approach is especially helpful for a grid or long row. It also makes future changes easy because artwork can move between consistent frame sizes without rebuilding the whole wall.
6. Combine photographs and illustrations thoughtfully
Photographs carry strong detail, while illustrations may have more open paper and simpler shapes. Spread the detailed images through the arrangement rather than clustering them on one side. Use matting to give a small photograph enough visual presence beside a larger drawing.
Choose images you have the right to display and reproduce. Family photographs, your own artwork, licensed prints, and public-domain material from a verified source are sensible options. Do not download a recognizable artwork or photographer's image simply because it appears in search results.
Try a shared theme that is broad enough to be personal: local architecture, gardens, family moments, and abstract color can work together when the palette is edited.
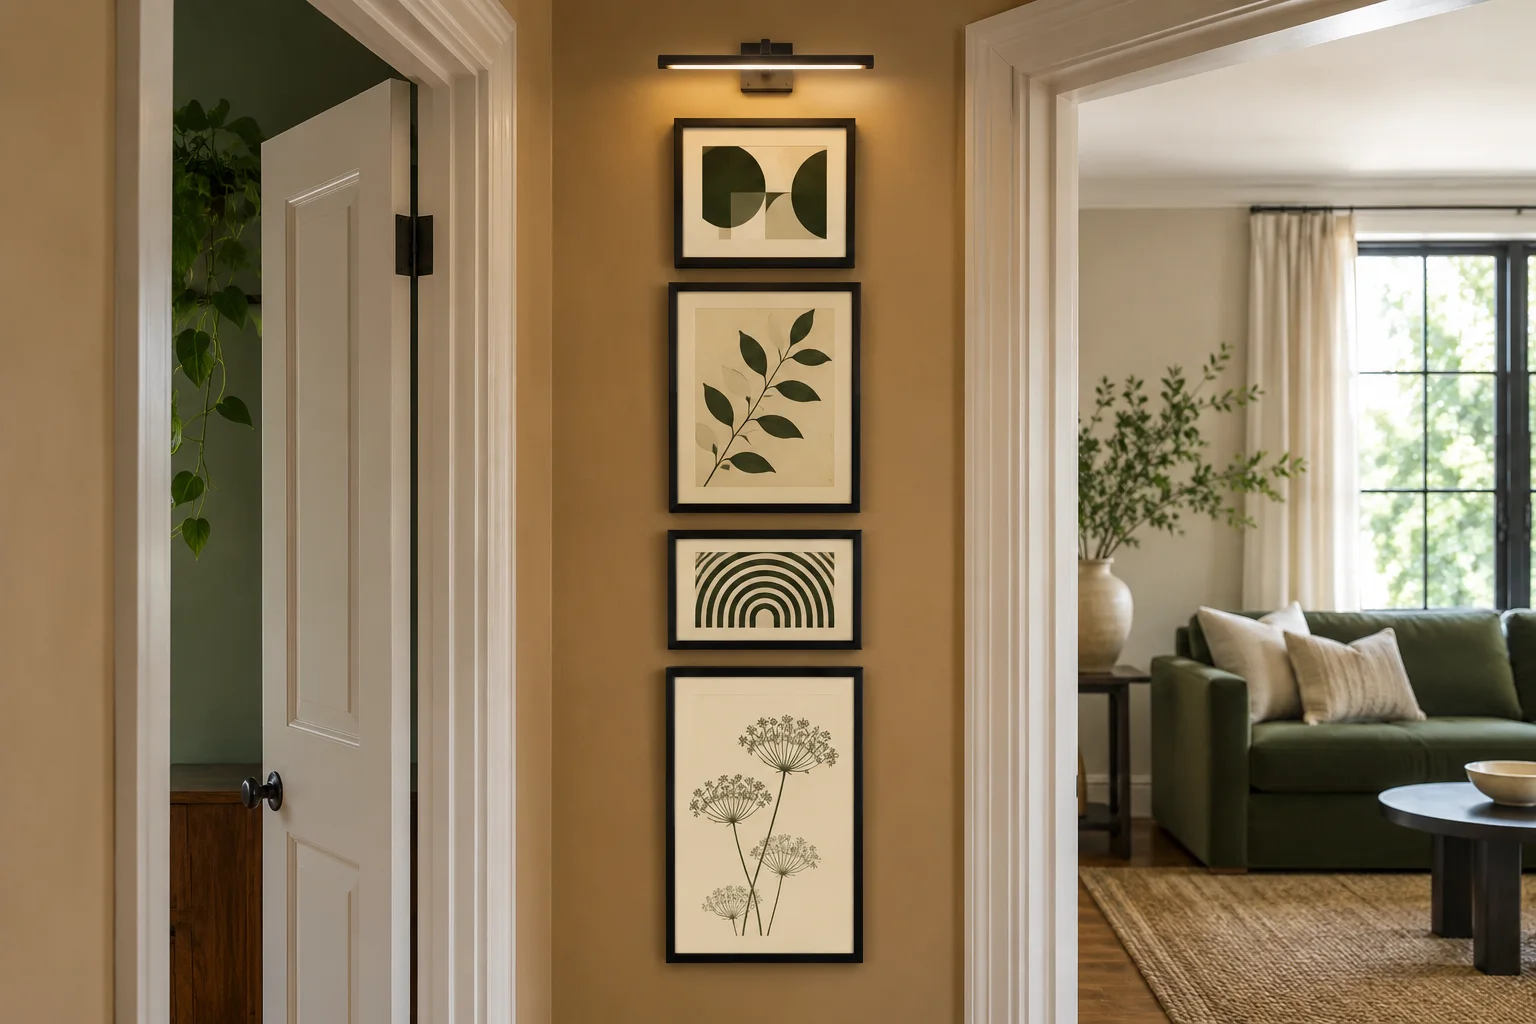
7. Stack a narrow vertical gallery on a small wall
A sliver of wall between two doorways or beside a bookcase can support a vertical arrangement. Three or four frames create more impact than one undersized picture, while using almost no floor area.
Align the centers for a formal look, or align one outer edge when the frames have different widths. Keep the overall grouping inside the trim lines so doors can open fully and people do not brush against projecting frames.
A vertical gallery naturally draws the eye upward, but it should not begin at the baseboard or disappear into the ceiling. Evaluate it from the adjoining room as well as directly in front.
8. Let the gallery respond to existing furniture
You do not need an empty wall. A gallery can wrap visually around a low cabinet, sit beside a tall bookcase, or step around a wall sconce. The existing feature becomes part of the composition.
Trace the furniture and fixed elements on your paper plan. Keep frames clear of cabinet doors, moving lamps, thermostat access, and anything that produces heat. If a table lamp overlaps the gallery from normal viewing height, that can add depth, but it should not block the main artwork.
Avoid filling every leftover pocket. Negative space around a bookcase or doorway can be as important as the frames themselves.
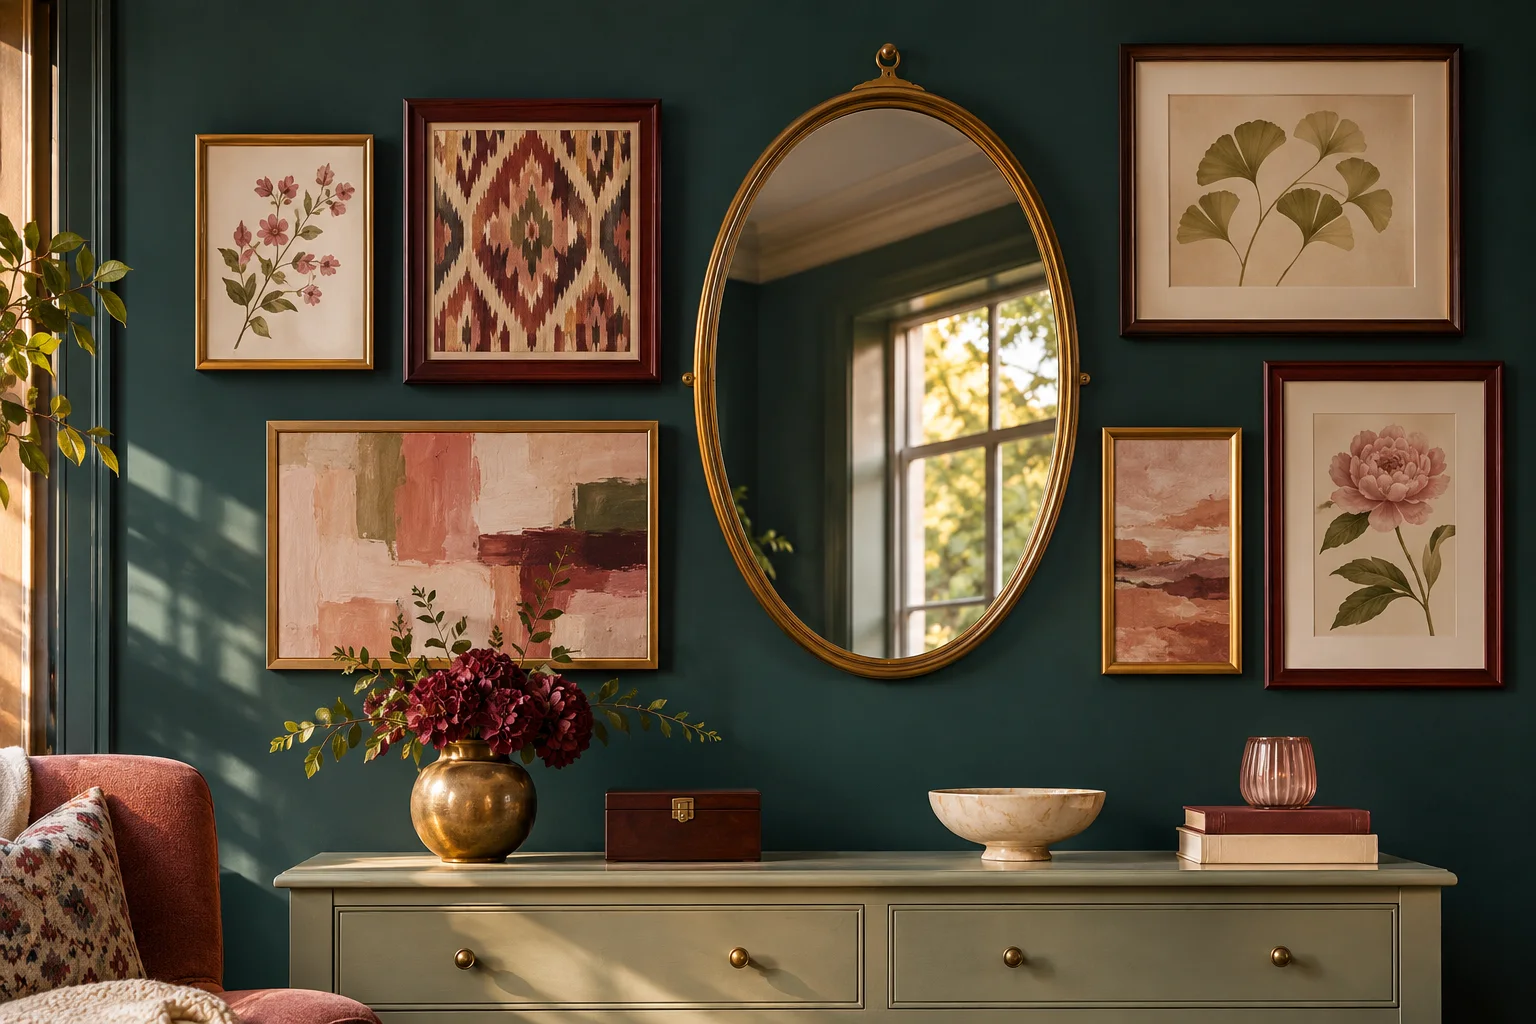
9. Include one mirror as a visual pause
A mirror can break up a wall of paper and glass while reflecting useful daylight. Treat it as one of the heavier visual pieces and arrange the art around its actual outline.
Check the reflection from the sofa and doorway. A mirror that doubles a window or open view can be helpful; one that reflects a television cable or cluttered shelf may distract from the art. Curved mirrors add contrast to rectangular frames, but one is usually enough in a modest grouping.
Mirrors require hardware rated for their weight, construction, and wall type. A decorative adhesive product is not automatically approved for a heavy mirror. Follow the mirror and hardware instructions and use professional help when the load or wall condition is uncertain.
10. Make a gallery from budget-friendly art
A meaningful gallery does not require expensive limited editions. Frame your own photographs, children's drawings, fabric remnants, old maps you legally own, pressed botanicals prepared safely, or public-domain images downloaded from a reliable archive.
Spend selectively on frames and mats that protect the work and fit the wall. Secondhand frames can be repainted or grouped by finish, but inspect the joints, glazing, backing, and hanging hardware. Replace damaged wire or weak fasteners instead of trusting an old assembly.
Print one test image before ordering a complete set. Paper tone, crop, and contrast can look different at full size than they did on a screen.
11. Plan a renter-friendly gallery within product limits
Removable picture-hanging products can reduce wall holes, but each product has a specific surface list, frame-size limit, weight rating, preparation method, and waiting period. Follow the instructions for the exact product rather than assuming all adhesive strips work alike.
Weigh the finished frame with its glazing and backing. Do not hang valuable or irreplaceable objects with a method whose manufacturer excludes them. Wallpaper, textured surfaces, fresh paint, high heat, and certain frame materials may also be unsuitable.
If the lease allows small holes, properly chosen picture hooks may be more reliable for some frames than forcing an adhesive solution onto an incompatible wall. Get permission where required and plan how holes will be repaired at move-out.
12. Expand the gallery without losing its balance
A gallery can grow gradually when the original arrangement leaves a logical edge. Begin with a complete small composition, not a sparse scattering designed around future purchases.
Photograph the wall and save the measurements, frame finishes, and average spacing. When you add a piece, test a paper template at the outer edge and compare its visual weight with the opposite side. A new large dark frame may require a smaller balancing piece elsewhere.
Growth does not have to mean filling the entire wall. Stop when the grouping feels complete in relation to the furniture and room. The remaining wall is not unfinished.
Use paper templates before making holes
Trace each frame onto kraft paper, label it, and mark the exact hanger position on the template. Arrange the shapes on the floor first, then tape them to the wall with a surface-appropriate low-tack tape.
View the paper arrangement in daylight and at night. Sit on the sofa, stand in the doorway, and check the relationship to furniture. Measure the gaps, but let optical adjustments resolve places where a deep frame or strong image makes equal spacing look uneven.
When the arrangement is right, transfer each marked hanger position according to the hardware instructions. Work one frame at a time and recheck the level as you go.
Common gallery wall mistakes
Choosing art before measuring the wall. The collection can become too small for the sofa or too broad for the available space.
Treating one hanging height as universal. Furniture, ceiling height, frame dimensions, and sightlines all affect the composition.
Ignoring the hardware on the back. Sawtooth hangers, D-rings, and wire sit at different distances from the frame edge, so identical nail heights do not guarantee aligned frames.
Using one adhesive method for every object. Product limits vary. Mirrors, deep frames, valuable art, and unsuitable surfaces may require a different solution.
Adding filler art without a connection. A smaller, edited gallery usually feels more personal than a larger wall of generic pieces.
For more ideas about connecting art to the rest of the room, see our cozy living room ideas.
Frequently asked questions
How do I make a gallery wall look balanced?
Start with one anchor, distribute large and dark pieces across the arrangement, and repeat a limited set of colors or frame finishes. Test the complete outline with paper templates and stand back from several viewing positions.
How much space should be between gallery wall frames?
There is no spacing that suits every collection. Choose a consistent visual rhythm based on frame size and wall scale, then adjust slightly for deep profiles or unusually strong images. Smaller frames often tolerate tighter spacing than large pieces.
Where should a gallery wall go above a sofa?
Position it so the art and sofa read as one group, with enough separation to protect the frames from heads and cushions. Use the sofa width and back height as references rather than copying a universal hanging number.
Can renters make a gallery wall without nails?
Sometimes. Use removable products only on approved surfaces and within the exact frame-size and weight limits. Follow cleaning, curing, placement, and removal instructions, and do not use them for excluded items such as valuable art.
How can I preview a gallery wall layout?
Arrange the frames on the floor, photograph the options, then make full-size paper templates. Mark hanger positions on the paper and tape the set to the wall before installing hardware.
Sources
- The Home Depot: How to hang a picture for wall measurement, paper templates, hanger types, and installation planning.
- 3M: Command picture-hanging selection guide for product-specific frame dimensions and weight ratings.
- 3M: Command picture-hanging product information for surface preparation, waiting periods, exclusions, and removal instructions.
Image note: All room scenes and artwork shown in this article are AI-generated conceptual illustrations created for NorahDecor. They do not reproduce a known artwork or document a real installation.