Seasonal Decor
15 Christmas Window Painting Ideas That Make Your Home Feel Festive
Try 15 Christmas window painting ideas, from white snowflakes and snowy villages to gingerbread houses. Plus glass marker tips and cleanup advice.
- Published
- November 15, 2026
- Reading time
- 19 minutes
- By
- NorahDecor Editorial
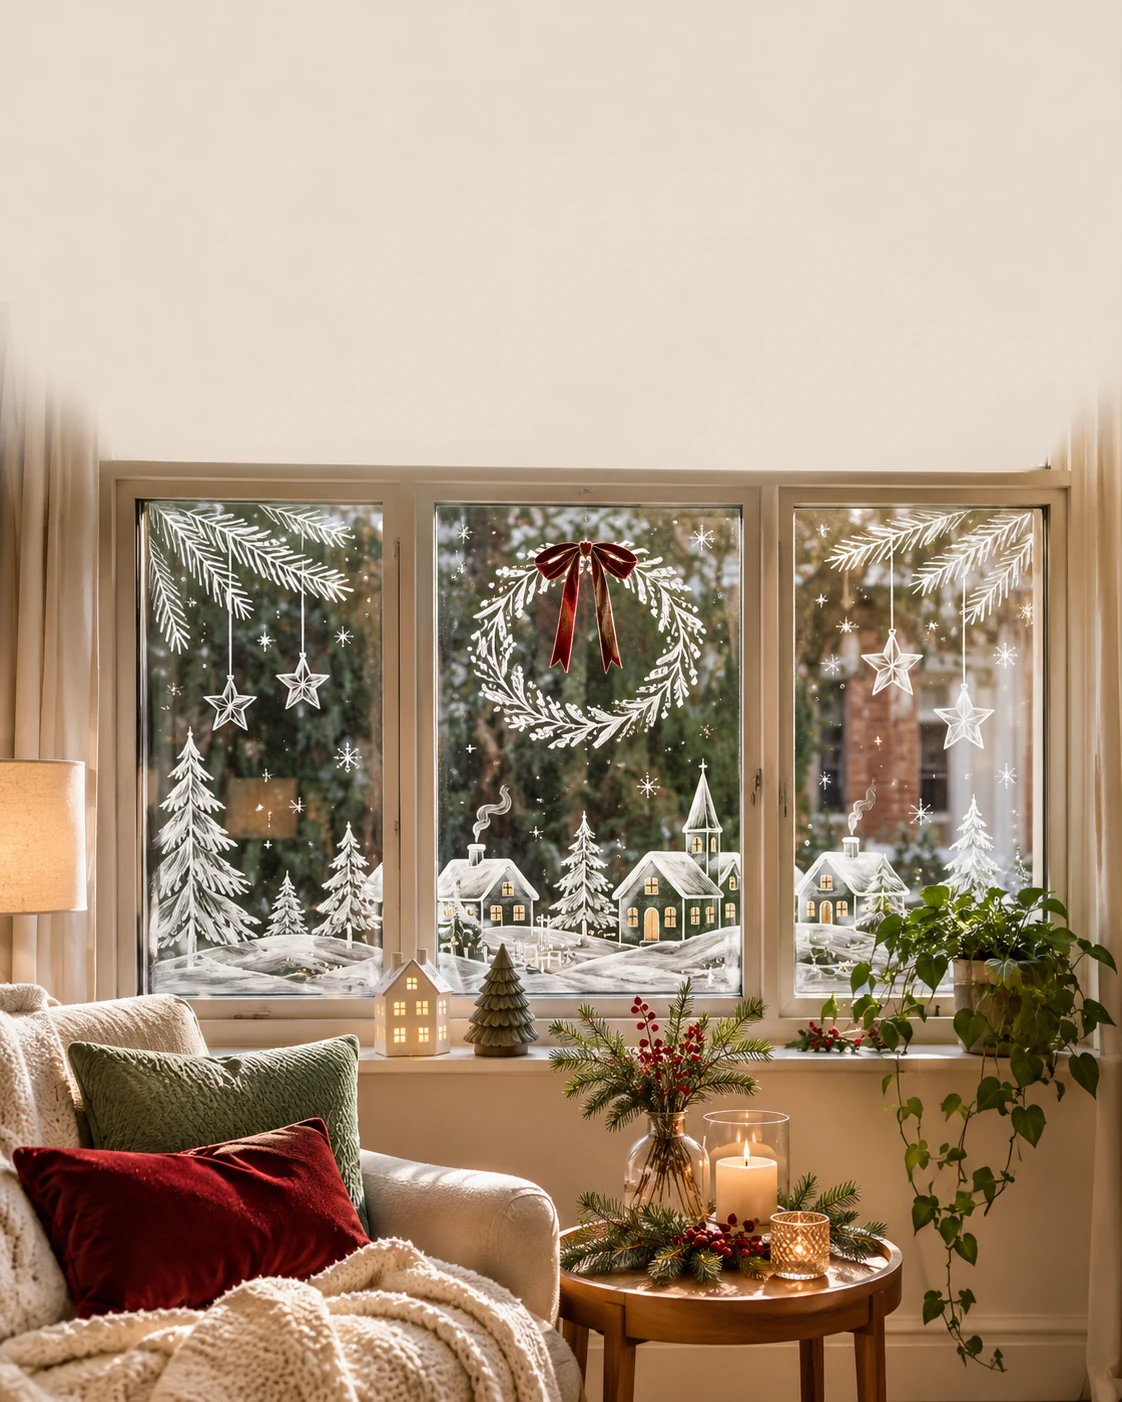
A Christmas tree is lovely, but sometimes the best place to decorate is the window you already have. A few white snowflakes can make an ordinary pane feel wintry. A row of little houses can turn a kitchen window into a miniature Christmas village. And a painted wreath adds something festive without using up a shelf, table, or inch of floor space.
These Christmas window painting ideas are especially useful in apartments and smaller homes, where big holiday decorations can crowd the room. Most of the designs below are based on simple outlines you can adapt to your window size. Some need only a white marker. Others bring in a little red, green, or gold for a more playful look.
The key is to choose a removable product specifically approved for your particular glass surface. The illustrations in this guide are original conceptual design images to inspire your own holiday window layouts.
Before you paint: choose the right supplies
For a temporary holiday display, look for washable window markers or liquid-chalk markers labeled for smooth glass. The words paint marker, acrylic, and permanent are not interchangeable with washable. Some glass products are designed to remain in place, while others wipe away with water.
A basic supply kit is small:
- One white fine-tip glass-safe marker for outlines, snowflakes, stars, and little buildings.
- One wider-tip washable chalk marker, optional, for snowy ground, thick tree shapes, and larger areas.
- Red and green window-safe markers, optional, for bows, candy canes, and vintage motifs.
- A soft microfiber cloth, a little water, and a dry towel to clean and dry the glass.
- Plain paper, a pencil, and removable tape, if the surface allows it, to hold a tracing template on the opposite side of the window.
- A small sheet of scrap paper to prime and test the marker before it touches the pane.
Manufacturer guidance matters. edding describes its liquid-chalk markers as removable with a damp cloth from smooth, nonporous surfaces. POSCA says its marks can be washed off glass but cautions that pigments may lodge in scratches on old porous glass. Crayola also warns against using its washable window markers on some treated mirrors and UV-film surfaces. Those statements don't mean every brand or surface behaves the same way. Always follow the instructions for your own product and window.
Check the pane before you begin. Avoid applying markers over window films, special coatings, frosted treatments, tinted or decorative surfaces unless both the window and marker manufacturers approve. Test a tiny, inconspicuous spot, allow it to dry, and confirm that it removes cleanly. If you rent, check the lease or ask your landlord if necessary. Keep designs away from seals and moving hardware, and never lean outside or over a railing to reach exterior glass.
A quick method for neat lines
- Clean the interior glass surface as instructed by the marker manufacturer, then dry it completely.
- Sketch the design at roughly the size you want. For repeating shapes, print or draw a simple paper template.
- If suitable, tape the template to the other side of the pane or hold it behind the glass, avoiding treated surfaces and adhesive-sensitive finishes.
- Prime the marker on scrap paper. Draw the largest shapes first, then add details and little snow dots.
- Step back every few minutes. A window design should be easy to read from across the room, not just up close.
- Allow the product to dry as directed. Check how the art looks during daylight and after dark.
If you're a beginner, start with a small corner or one lower panel. A deliberate, simple design usually looks better than a whole window filled with unrelated motifs.
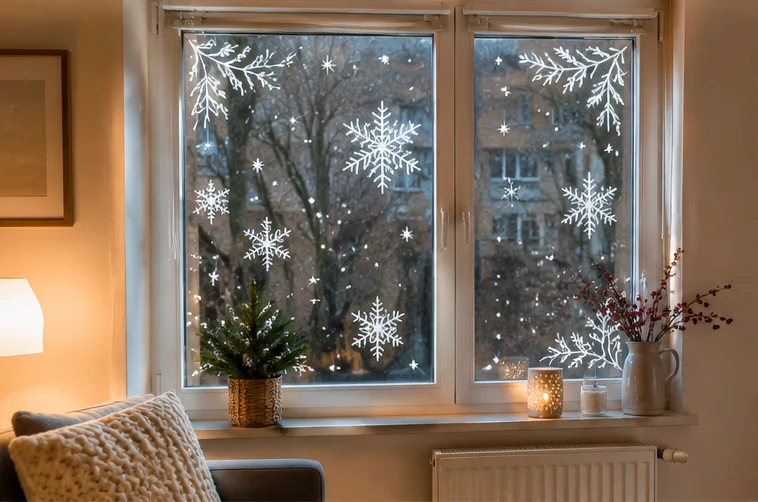
1. Frame the window with white snowflakes
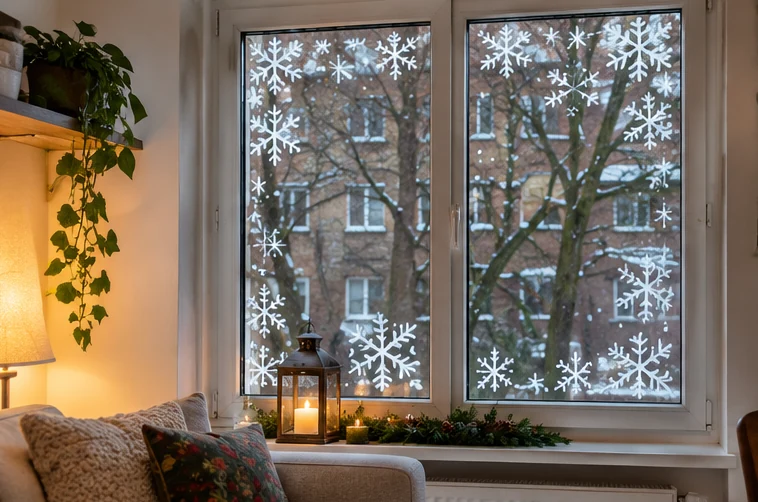
Snowflakes are the most forgiving starting point because they don't have to match perfectly. Draw a handful of large six-armed flakes around the upper corners, then fill a few gaps with smaller stars and dots. Instead of spreading them evenly across every inch of glass, concentrate them around the edges so the view remains visible.
For a more coherent result, repeat just two or three flake styles: a simple branching snowflake, a geometric one made from straight lines, and a small six-point star. Vary the scale more than the complexity. One large flake near a corner looks intentional when several smaller ones trail away from it.
Best placement: A living-room window or narrow side window where you want decoration without blocking daylight.
Make it easier: Draw one large paper snowflake first and trace variations of it. No need to freehand a dozen completely different designs.
2. Paint a snowy Christmas village along the bottom
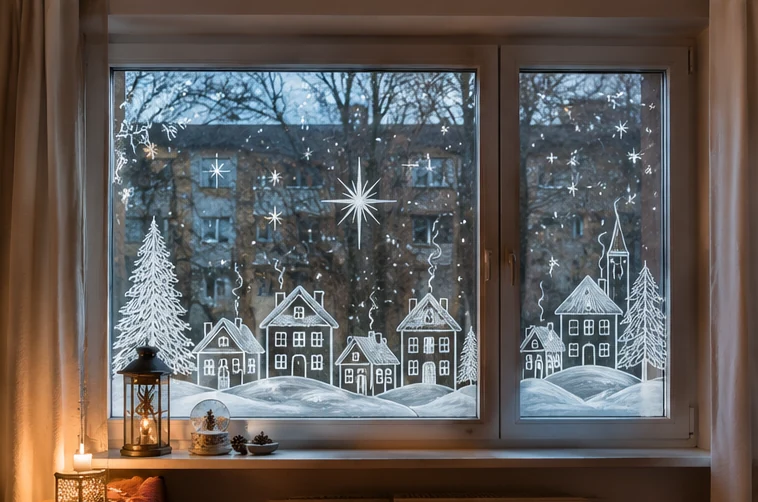
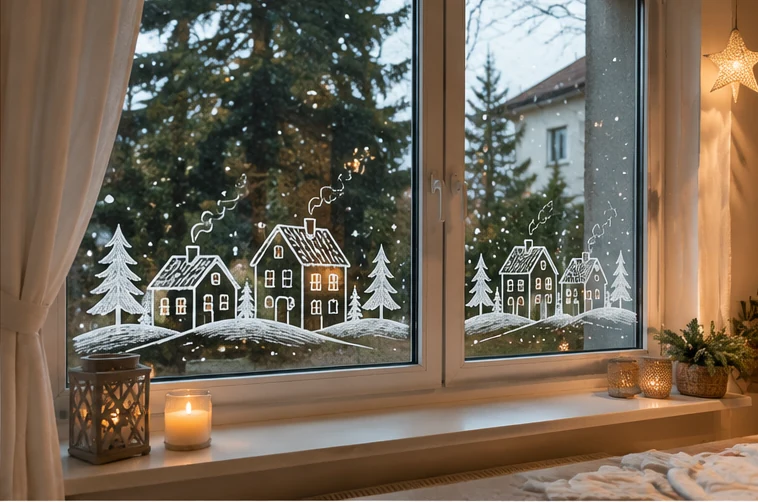
A row of tiny houses transforms the bottom third of a window into a winter skyline. Begin with a gently curved line of snow. Add three to five houses with different roof shapes, a small church or clock tower if you like, and two or three trees between buildings. Square windows and little chimneys make the houses recognizable without requiring detailed artwork.
You can keep the village all white for a Scandinavian look. For an evening scene, add a few small gold or pale-yellow windows if your marker is designed for glass. The glowing effect in inspiration photos comes partly from the surrounding room lighting; marker colors will look different on a real pane.
Best placement: A wide kitchen or living-room window with enough uninterrupted glass at the bottom.
Avoid: Drawing buildings over latches or seals or filling the central view with heavy opaque color.
3. Make a playful gingerbread-house window scene
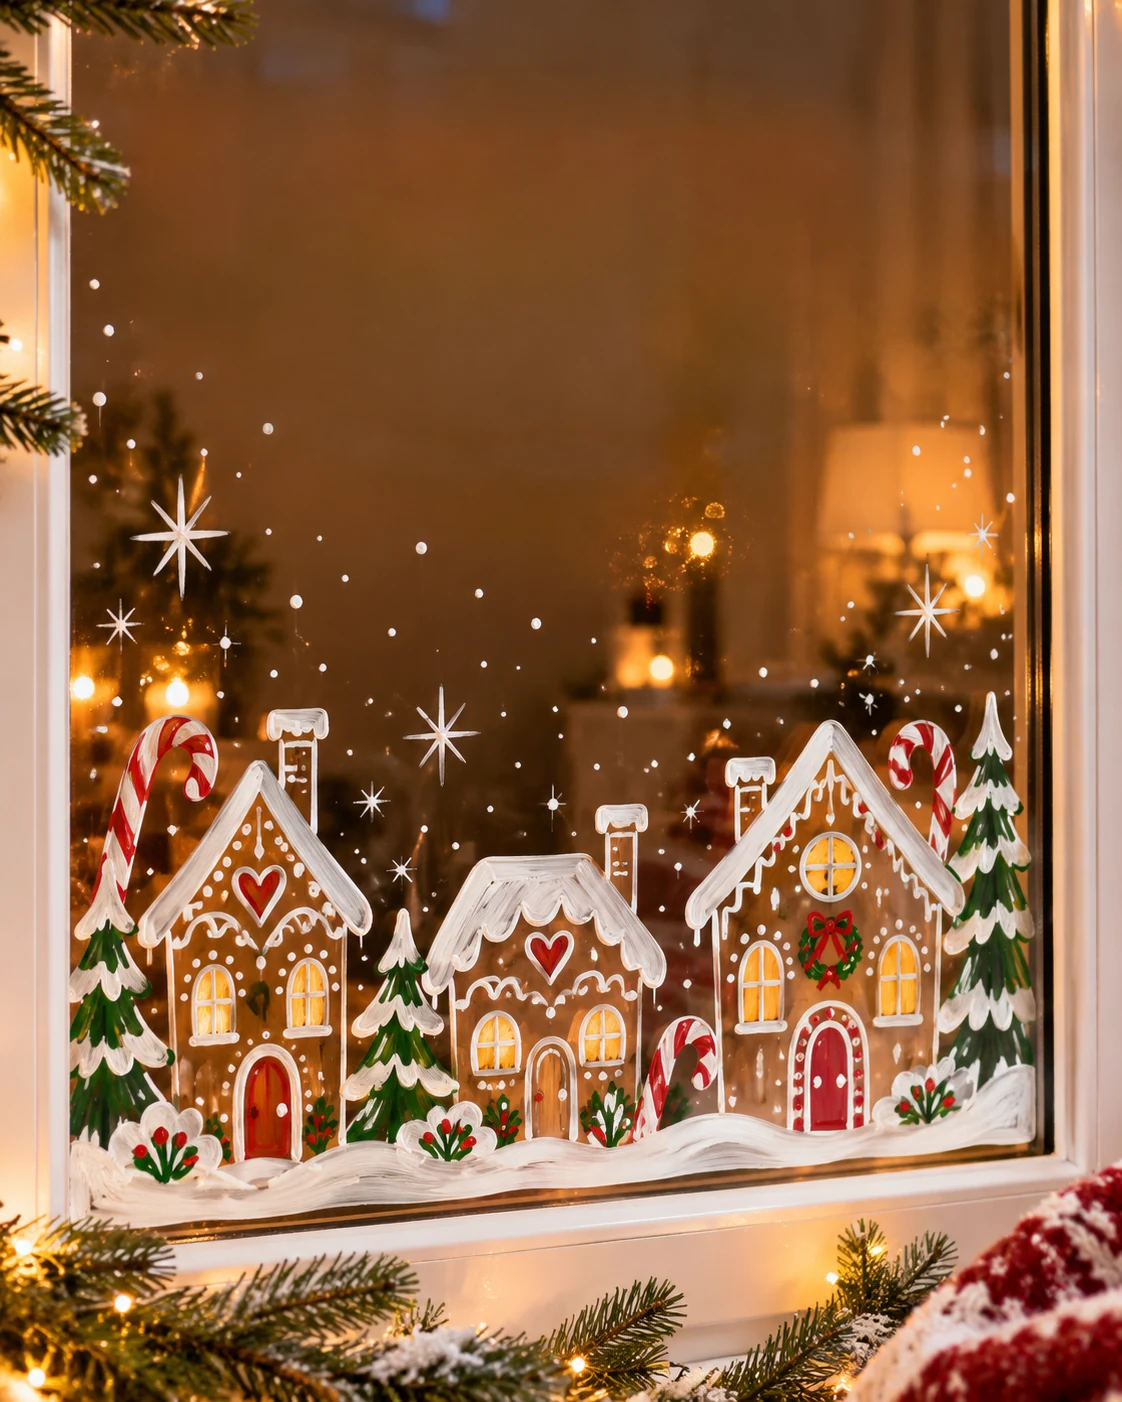
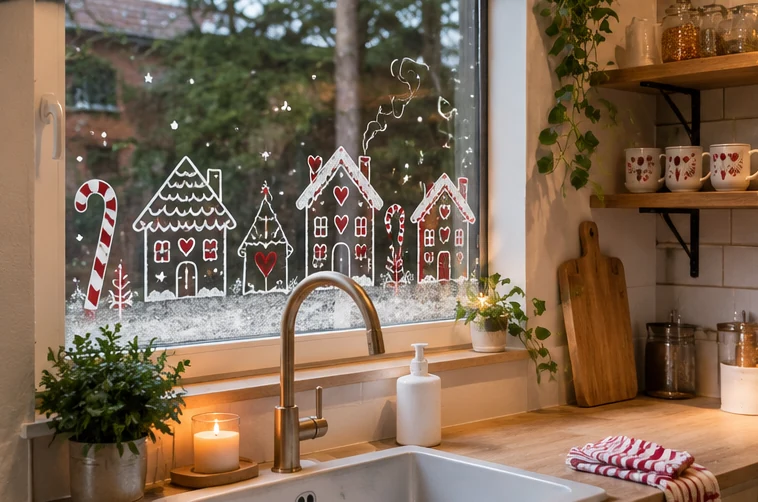
A gingerbread village feels more cheerful than a traditional snowy skyline. Use white icing-like lines for the roof edges, doors, and windows, then add red candy canes, tiny green trees, and a few dots that suggest candy or gumdrops. The trick is to make the outlines simple enough that the gingerbread shapes remain readable from a distance.
Draw a peaked roof, rectangle walls, one door, and two windows for each house. Repeat the same basic form at different heights. A curved line along the bottom ties the houses together and looks like a snowy drift.
For small apartment kitchens, try one gingerbread house in each lower corner rather than a full strip across the window. That leaves the central glass clear while still creating a festive view over the sink.
4. Draw ornaments hanging from an evergreen branch
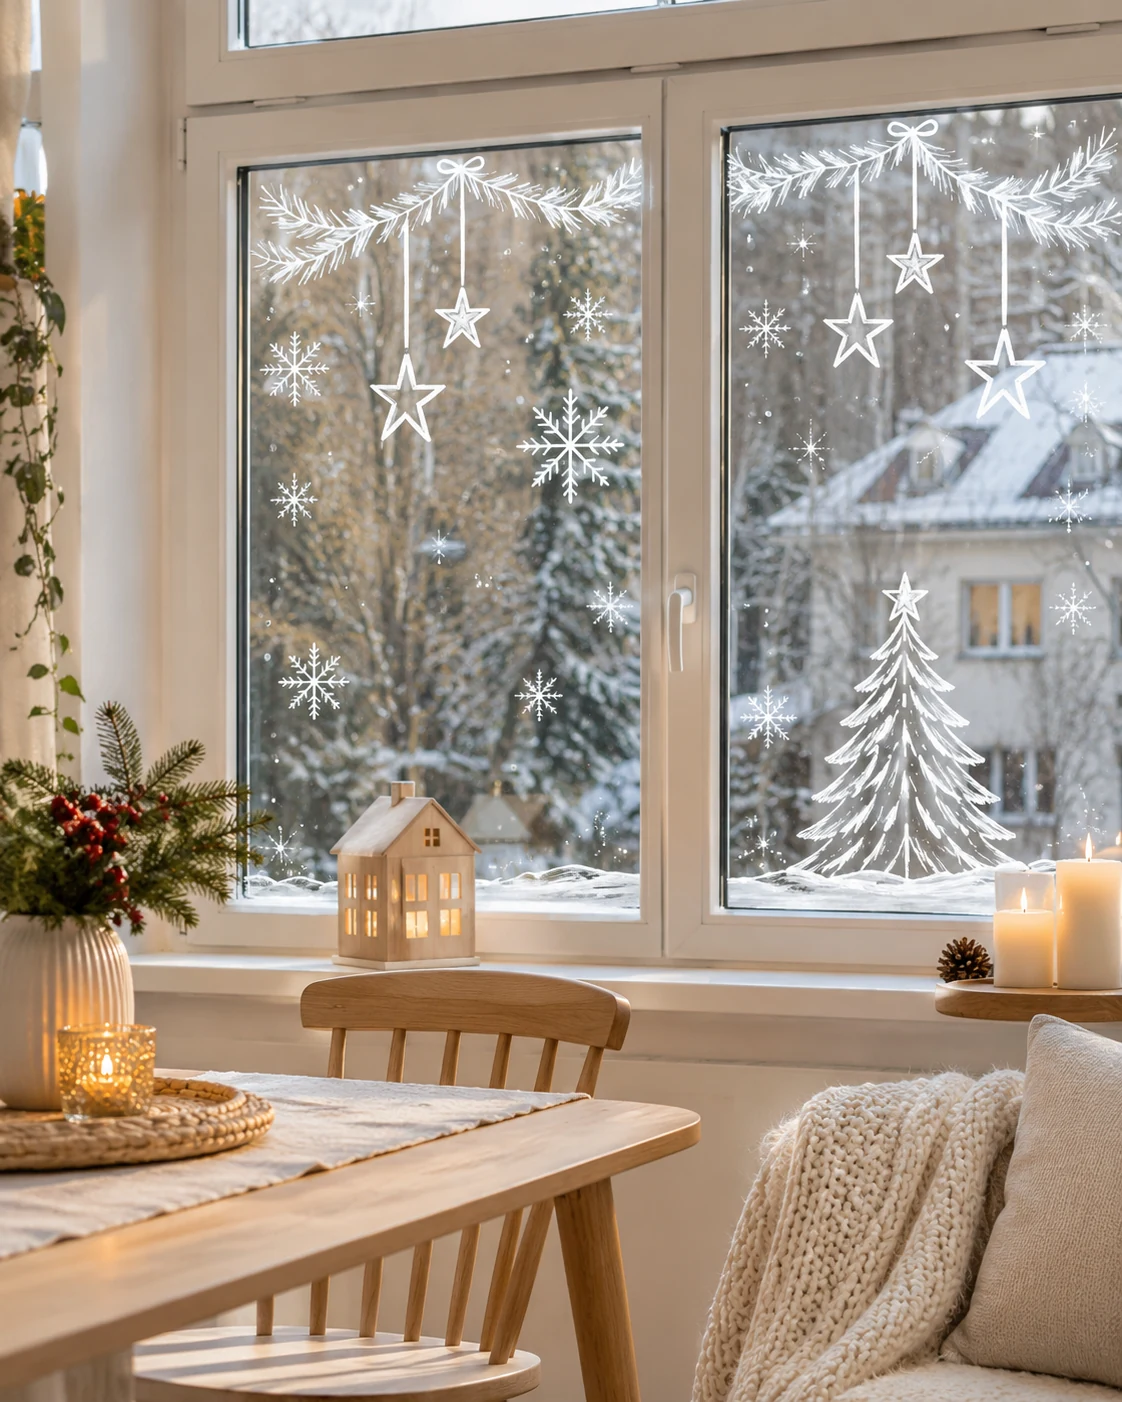
This is a good choice when you prefer a cleaner, less childlike Christmas design. Paint a thin evergreen branch along the top edge of the window. Add five or six fine hanging lines of different lengths, then draw simple circles, stars, or teardrop ornaments at their ends.
Use more blank space than you think you need. The ornaments should have enough room to hang individually rather than blending into one dense pattern. A small red bow at the center can be the only color in an otherwise white drawing.
Best placement: A dining-room window or glass door with a clear upper section. Keep markings away from handles and frequently touched areas.
Shortcut: Choose only three ornament shapes and alternate them. The repetition looks polished even if every circle isn't perfect.
5. Keep it minimal with a row of Christmas trees
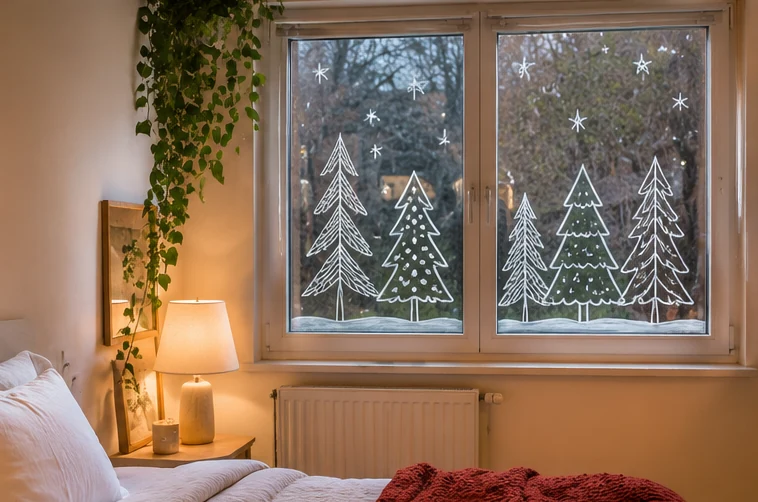
If intricate drawing isn't your thing, make a tiny forest from simple tree outlines. Try one tree made from three stacked triangles, one from short zigzag branches, and one from continuous curved lines. Give each a short trunk, add a few scattered stars, and draw a small snowbank beneath them.
In a narrow window, three trees of different heights are enough. In a wider one, space out five or seven trees so they don't look like a tightly packed fence. Leaving space between them helps the light come through.
This design works especially well in bedrooms and home offices because it adds a subtle seasonal detail without turning the whole space into a Christmas display.
6. Paint evergreen branches with a red bow
A few sweeping evergreen branches make an elegant frame. Start with a slightly curved central stem near the top or outer corner. Add short needles angled away from it, then repeat with a second and third branch. A bow where the branches meet gives the drawing a natural focal point.
Don't try to copy every pine needle in a photograph. Draw the main branch first, then use short grouped strokes. Keep the red bow simple: two loops, a small center knot, and two hanging ribbons. A restrained red-and-white palette will be easier to coordinate with the rest of the room.
Best placement: The upper corners of a window above a sofa, desk, or dining nook. A branch can follow the frame instead of interrupting the view.
7. Add a reindeer and a few stars
For a more whimsical scene, paint a reindeer silhouette on one side of the window with a little line of snow underneath. You can keep the body simple: an oval torso, four narrow legs, a small head, and branching antlers. If drawing an animal feels daunting, trace a basic paper silhouette made for your own use.
Add a cluster of stars around the animal rather than another full scene. A tiny red scarf gives it an old-fashioned Christmas-card feeling, while an entirely white outline makes it look quieter.
This one is effective on a picture window where the reindeer can be placed off-center, letting the rest of the view remain visible. Avoid painting over an existing wildlife deterrent decal or any marking required for the glass.

8. Create frosty corners instead of covering the glass
If you want something especially quick, decorate only the lower two corners. Use a broad washable white marker to suggest short frosty strokes, then add three or four snowflakes coming out from the corners. Let the details become lighter and farther apart as they move toward the center of the window.
This makes the glass look decorated while preserving most of the daylight and outdoor view. It also works with other holiday items already in the room because the art isn't competing for attention.
9. Make a wreath the centerpiece of one pane
A painted wreath looks especially good on a single large window panel. Start with a light circle, but don't chase perfection. Use short curved lines to create greenery around the ring, leaving some irregular gaps that make it feel organic. Add a few berries and a bow at the top or bottom.
For a beginner-friendly version, skip the leafy detail entirely: draw one neat circle, place small pointed leaves along it, and finish with a bow. The wreath should be large enough to read clearly but not so large that it touches the entire frame.
Best placement: A living-room window with a fairly clear view behind it, or a side pane next to a holiday seating area.
10. Try Scandinavian-style hanging stars
Hanging stars suit a restrained holiday palette. Draw a thin horizontal branch or just the hanging strings from the upper window frame. Add a mix of five-point and eight-point stars, keeping some outlines thin and others a little bolder.
The design works best when the stars have breathing room. Try arranging them in an uneven rhythm rather than a perfect row. A few miniature dots around the larger stars make the window look finished without needing a snow scene.
For a minimalist home, keep everything white. For a little more personality, color just one star in soft gold or red using a marker approved for the surface.
Helpful detail: A star near eye level can look surprisingly large from the street. Draw the outline on paper first to check how big it will appear on the glass.
11. Give the window a little winter woodland scene
A woodland scene is lovely if you want something between minimalist and storybook. Start with a curved snow line along the lower third of the pane. Add two fir trees, a small deer or rabbit silhouette, and a few stars. Keep the animals simple, with clear outlines that don't require painted fur or intricate faces.
Use a large tree to anchor one side and a smaller one for balance. The animals should occupy a smaller part of the scene, almost like a little detail someone notices on a second look.
This is one of the more involved designs here, so make a paper sketch before you start. If you only have one marker, a white silhouette can be every bit as appealing as a multicolor scene.
12. Draw a tiny fireplace-and-stockings vignette
For a playful indoor theme, paint a small fireplace on the lower part of a pane. Use a rectangular opening, a simple mantel, and two stockings hanging from the top. A few stacked lines can suggest brickwork without drawing every brick.
Add a small star or candle shape above the mantel if you like, but resist turning it into a fully furnished room. The idea is to suggest a cozy Christmas scene with a handful of recognizable elements.
Where it works: A small hallway or apartment window where a full village would look too busy. Keep the scene compact and leave the center of the window mostly clear.
13. Borrow colors from vintage Christmas cards
Vintage-inspired holiday designs often look charming because they use familiar motifs with limited colors. Instead of covering the window in solid red and green, draw white outlines and add only small colored accents: a red bow, a candy-cane stripe, holly berries, or a tiny evergreen tree.
Try a grouping of two gingerbread houses, one candy cane, and a few scattered stars. A muted, slightly imperfect arrangement can feel more inviting than a rigid graphic. However, don't intentionally make your lines messy; use confident strokes and step back to assess the whole composition.
Pairing a warm living room with red-and-white details creates seasonal character without buying extra tabletop decorations.
14. Add a short Christmas greeting
Sometimes a message is all a window needs. Write JOY, NOEL, or MERRY CHRISTMAS in large, simple letters, then add a small snowflake or star to either side. Use block lettering if you're new to glass markers. Script lettering can be beautiful, but it becomes hard to read when the line weight is too thin.
Before writing, lightly draw your letters on paper and hold the template behind the glass to check the spacing. If you plan for the message to be readable from outdoors, pay attention to which side of the pane you're working on. Lettering drawn from inside can appear reversed to viewers outside unless you reverse the template.
Keep the words centered or intentionally aligned with one edge. Avoid writing over latches or sections you need to handle frequently.
15. Build one full-window winter wonderland
If you're ready for a larger project, combine just three coordinated elements into one scene: a white village along the bottom, a few fir trees on either side, and snowflakes in the upper corners. That gives the window a sense of depth without turning it into a collage of every Christmas motif at once.
Sketch the main shapes in pencil on paper before painting. Draw the broad snowbank first, then the skyline, then the surrounding trees, and finally the light details. Check how the design looks from inside and outside, because the outdoor background can make some lines disappear during daylight.
Keep at least one generous area of open glass, especially in a small room. It makes the scene feel deliberate and preserves natural light.
Choose the right design for your window
| Window or room | Design to try | Why it works | | --- | --- | --- | | Narrow bedroom window | Minimalist trees or hanging stars | Clear shapes look good without much space. | | Kitchen window above a sink | Two gingerbread houses or a low village | The design stays near the bottom and leaves the view open. | | Large living-room window | Wreath or a winter wonderland | One strong focal point balances the larger surface. | | Renter's window | Small snowflake border with approved washable marker | Easy to test and simpler to remove. | | Window beside a reading chair | Evergreen corner branches | Adds holiday atmosphere without a huge display. | | Glass door | Upper-corner snowflakes or stars | Avoids heavy artwork near handles and commonly touched areas. |
How to remove Christmas window painting afterward
You don't need to leave holiday designs up until spring. For a product labeled washable on your particular smooth glass, removal is usually straightforward when you follow the manufacturer instructions.
- Check the product label again. Different types of window paint or markers may require different cleaning methods.
- Start with a soft, damp cloth on a small section, rather than a scraper or harsh cleaner. edding recommends a damp cloth for its chalk markers, while Crayola recommends water and a towel for its washable window markers.
- Work gently in small areas. If the paint doesn't lift, stop and consult the product guidance. Don't improvise with abrasive pads, razor blades, solvents, or household chemicals on coated or delicate glazing.
- Dry the glass and frame with a soft cloth, taking care not to leave excess water around the seals.
- Check in daylight for any remaining marks or smears.
If the surface is damaged, unusually porous, or treated, do not assume the design is fully reversible. It's one reason to test first rather than decorating the entire pane immediately.
Five mistakes that make window art harder than it needs to be
Using a marker without checking its label. Some paint pens are permanent. Look for explicit compatibility with the exact surface and for removal instructions.
Filling every inch of glass. Dense drawings can reduce daylight, obscure a useful view, and make the design visually confusing. A single scene with open space around it is often more attractive.
Painting before cleaning and drying. Grease, condensation, and moisture can interfere with lines. Prepare the surface according to the product directions.
Making the details too tiny. A snowflake with twenty minute branches may look beautiful up close but turn into a white blur across the room. Vary scale and simplify.
Ignoring how the window is used. Don't cover hardware, safety markings, ventilation openings, or areas you touch every day. Never decorate by leaning outside a high window.
A simple 30-minute starter project
If you only try one idea this Christmas, choose a small snowflake-and-star border. The exact timing will vary, but it's manageable as a short craft session.
Spend the first few minutes checking the marker and cleaning a small test area. Draw one large snowflake on a sheet of paper, then trace it near the upper corner. Add two smaller snowflakes and a handful of dots. Step back, decide whether the balance looks right, and stop before the decoration becomes crowded.
You don't need glitter, a stencil machine, or a cart full of supplies. Just a suitable removable marker, a clean pane, and a simple plan can change how the room feels for the season.
Frequently asked questions
What kind of paint or marker should I use on Christmas windows?
For temporary decorations, choose a product explicitly labeled for use on your type of glass and intended to be washable or removable. Liquid-chalk window markers are one option for compatible smooth, nonporous glass. Do not assume ordinary acrylic paint or any generic paint marker will clean off easily.
Are Christmas window paintings easy to remove?
Many purpose-made washable window markers can be removed with a damp cloth from appropriate smooth glass. Removal is product- and surface-dependent, so always test a small spot first, particularly on older, scratched, treated, or filmed glass.
Can I paint on my apartment windows if I rent?
Only if your lease and property requirements permit it and the products are suitable for the glazing. Avoid permanent paint, damaged surfaces, and anything that could affect film or coatings. Small removable designs are easier to assess, but they are not automatically approved by a landlord.
Which Christmas window painting is easiest for a beginner?
A border of large snowflakes or three simple Christmas trees is a good place to start. Both use repeated shapes, very little color, and enough open space that imperfect lines are less noticeable.
Should I paint on the inside or outside of the window?
The interior surface is generally more accessible, but follow your product's application instructions and consider the glazing type. Avoid accessing outside glass from a height. If you are writing words to be read from the street, reverse the template as needed.
How do I make a design visible at night?
Use bold, legible outlines and avoid excessively fine details. Existing warm indoor lighting can make the art more noticeable against the darker outdoors, but don't place hot lights or candles dangerously close to curtains or decorations. If using electric lights, follow their product instructions.
The little Christmas detail you may enjoy most
A painted window doesn't have to be elaborate to make a room feel festive. A few snowflakes around the corner can be enough for a small kitchen; a snowy village might be the right choice for a family living room; and a simple wreath works when you want Christmas decor that feels quiet and elegant.
Choose one idea that fits your window, use materials made for the surface, and leave a little room for the view outside. The result can be seasonal, personal, and easy to enjoy without adding one more bulky decoration to your home.
For more holiday decorating ideas that respect limited square footage, read our guide to Christmas apartment decor ideas.
Sources
- edding: Chalk markers for windows and smooth glass
- edding: Painting on glass with markers
- POSCA: Using markers on glass
- Crayola: Removing washable window markers from glass
Editorial note: All illustrated interior photographs in this article were generated originally to demonstrate creative window-painting possibilities. They are concept imagery, not documented completed DIY projects or photographs of actual homes.